转录组数据转移和细胞类型注释#
当我们拥有不同来源或不同条件下的多个数据集时,经常需要在它们之间转移细胞类型标签。Omicverse提供了多种方法来实现这种标签转移。这包括基于参考的方法和无参考的方法。在本教程中,我们将演示如何使用Omicverse将细胞类型注释从一个数据集转移到另一个数据集。
import omicverse as ovimport matplotlib.pyplot as pltimport scanpy as scov.ov_plot_set()
数据准备#
我们将使用两个相关的单细胞RNA-seq数据集来演示标签转移。
rna=sc.read("data/analysis_lymph/rna-emb.h5ad")atac=sc.read("data/analysis_lymph/atac-emb.h5ad")
加载查询数据#
首先,我们加载将接收注释的查询数据集。
import scanpy as sccombined=sc.concat([rna,atac],merge='same')combined
AnnData object with n_obs × n_vars = 68415 × 0
    obs: 'balancing_weight', 'domain'
    var: 'chromStart', 'chromEnd', 'highly_variable'
    obsm: 'X_glue'
    varm: 'X_glue'
combined.obsm['X_mde']=ov.utils.mde(combined.obsm['X_glue'])
加载参考数据#
接下来,我们加载包含已知细胞类型注释的参考数据集。
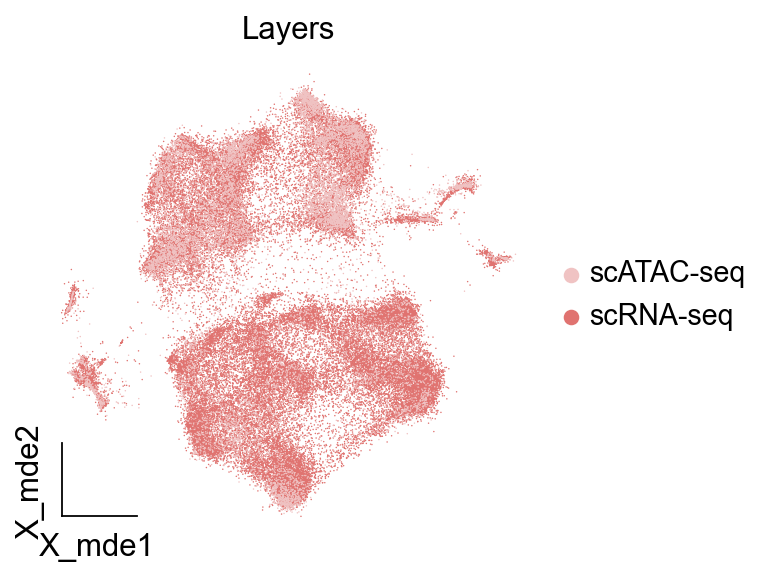
ov.utils.embedding(combined, basis='X_mde', color='domain', title='Layers', show=False, palette=ov.utils.red_color, frameon='small' )
<AxesSubplot: title={'center': 'Layers'}, xlabel='X_mde1', ylabel='X_mde2'>
标签转移方法#
我们将演示几种不同的标签转移方法。
# 导入库
import scanpy as sc
import omicverse as ov
# 设置绘图参数
ov.plot_set(font_path='Arial')
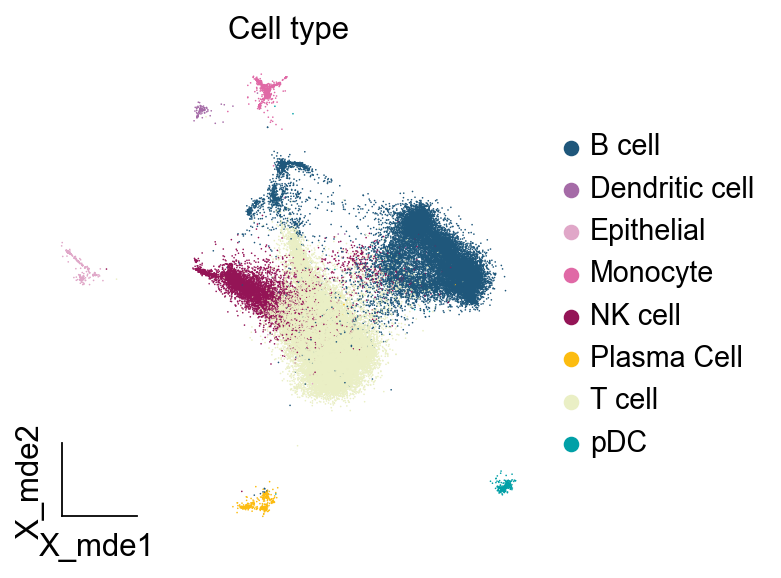
<AxesSubplot: title={'center': 'Cell type'}, xlabel='X_mde1', ylabel='X_mde2'>
方法1:使用SCVI的标签转移#
SCVI是一种基于变分自编码器的集成方法。
knn_transformer=ov.utils.weighted_knn_trainer( train_adata=rna, train_adata_emb='X_glue', n_neighbors=15,)
Weighted KNN with n_neighbors = 15 ...
labels,uncert=ov.utils.weighted_knn_transfer( query_adata=atac, query_adata_emb='X_glue', label_keys='major_celltype', knn_model=knn_transformer, ref_adata_obs=rna.obs,)
finished!
结果评估#
在应用标签转移后,我们评估转移的质量。
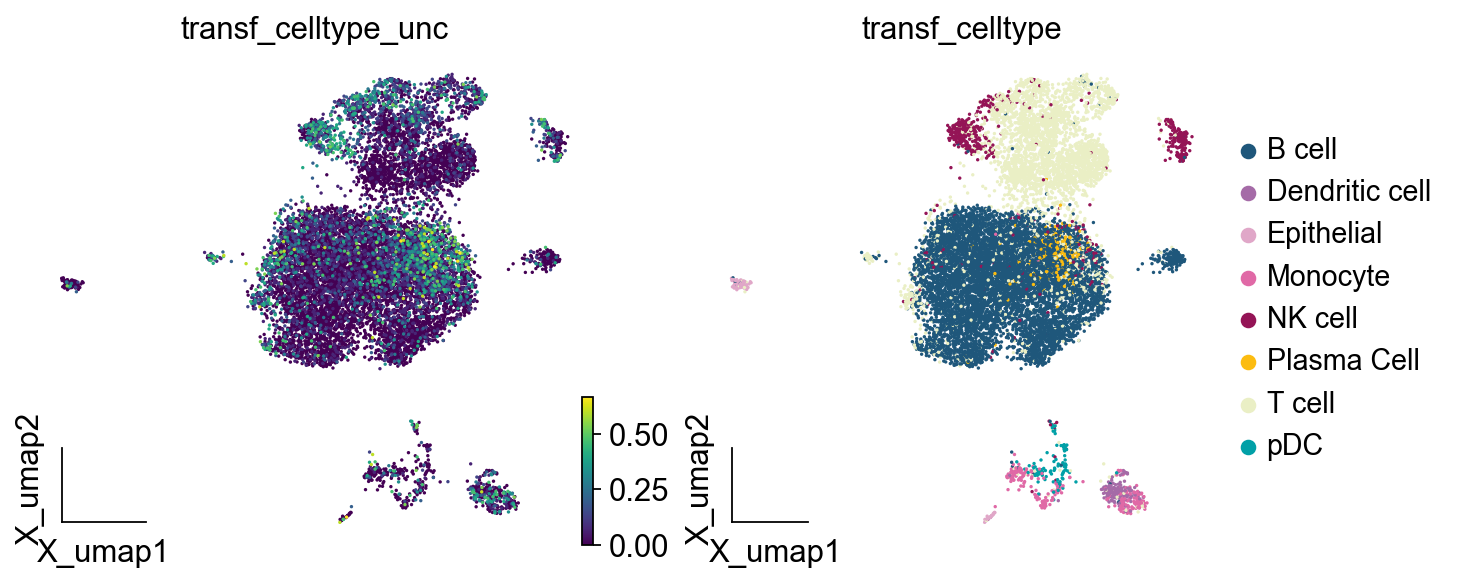
atac.obs["transf_celltype"]=labels.loc[atac.obs.index,"major_celltype"]atac.obs["transf_celltype_unc"]=uncert.loc[atac.obs.index,"major_celltype"]
atac.obs["major_celltype"]=atac.obs["transf_celltype"].copy()
# 评估标签转移结果
result = ov.single.Annotation(adata)
result.evaluate(reference_label='cell_type')
[<AxesSubplot: title={'center': 'transf_celltype_unc'}, xlabel='X_umap1', ylabel='X_umap2'>,
 <AxesSubplot: title={'center': 'transf_celltype'}, xlabel='X_umap1', ylabel='X_umap2'>]
共识注释#
我们还可以使用多种方法的共识来获得更可靠的注释。
import scanpy as sccombined1=sc.concat([rna,atac],merge='same')combined1
AnnData object with n_obs × n_vars = 68415 × 0
    obs: 'major_celltype', 'balancing_weight', 'domain'
    var: 'chromStart', 'chromEnd', 'highly_variable'
    obsm: 'X_glue'
    varm: 'X_glue'
combined1.obsm['X_mde']=ov.utils.mde(combined1.obsm['X_glue'])
可视化结果#
最后,我们可视化转移的细胞类型注释。
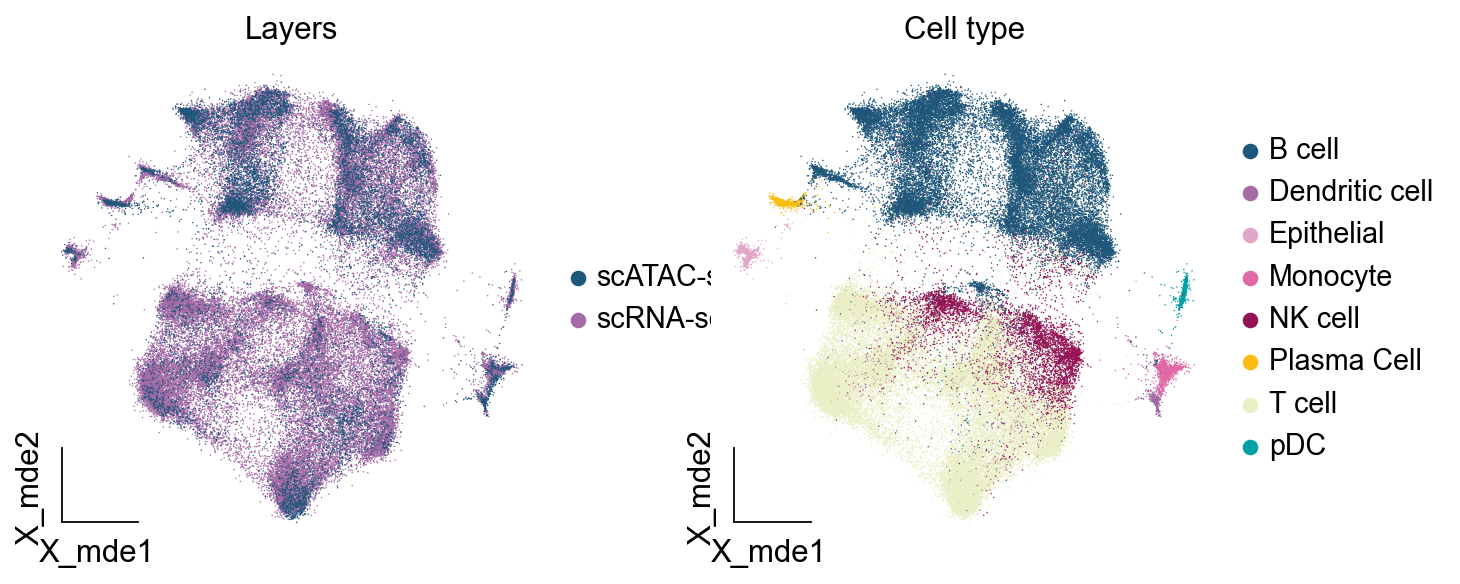
ov.utils.embedding(combined1, basis='X_mde', color=['domain','major_celltype'], title=['Layers','Cell type'], show=False, palette=ov.palette()[11:], frameon='small' )
[<AxesSubplot: title={'center': 'Layers'}, xlabel='X_mde1', ylabel='X_mde2'>,
 <AxesSubplot: title={'center': 'Cell type'}, xlabel='X_mde1', ylabel='X_mde2'>]