
在 Claude Code 中使用 OmicVerse MCP — 逐步指南#
本页面专注于 Claude Code 工作流程:如何连接 OmicVerse MCP、验证工具、运行标准分析以及查看结果。更广泛的部署细节、完整工具目录和运行时内部机制现已整理至专属 MCP 页面。
相关页面#
最简 Claude Code 配置#
项目级 .mcp.json(使用 stdio)#
{
  "mcpServers": {
    "omicverse-local": {
      "type": "stdio",
      "command": "python",
      "args": [
        "-m", "omicverse.mcp",
        "--phase", "P0+P0.5",
        "--persist-dir", "/tmp/ov_persist_local"
      ],
      "env": {}
    }
  }
}
全局快捷方式#
claude mcp add omicverse -- python -m omicverse.mcp --phase P0+P0.5
本地 HTTP 选项#
启动 OmicVerse MCP:
NUMBA_CACHE_DIR=/tmp/numba_cache MPLCONFIGDIR=/tmp/mpl \
python -m omicverse.mcp \
  --transport streamable-http \
  --host 127.0.0.1 \
  --port 8765 \
  --http-path /mcp \
  --phase P0+P0.5
然后在 Claude Code 中配置:
{
  "mcpServers": {
    "omicverse": {
      "type": "http",
      "url": "http://127.0.0.1:8765/mcp"
    }
  }
}
逐步演练#
第 1 步:启动 Claude Code#
进入您的项目目录并启动 Claude Code:
cd /path/to/your/project
claude
第 2 步:验证工具已加载#
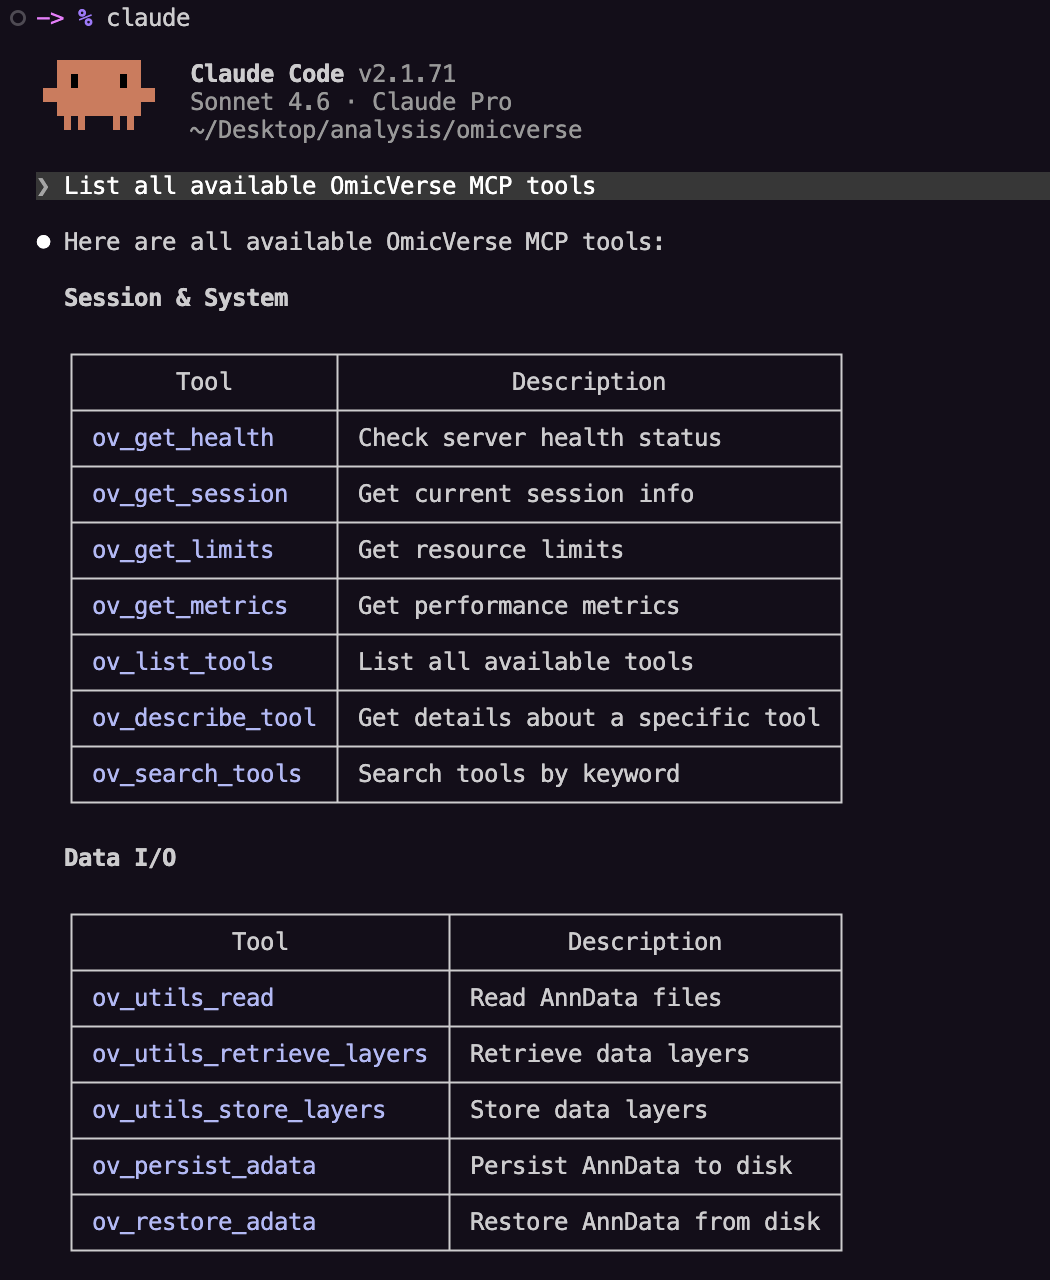
提问:
List all available OmicVerse MCP tools
第 3 步:加载数据#
提问:
Load the pbmc3k.h5ad file
或使用内置数据集:
Load the built-in seqfish dataset
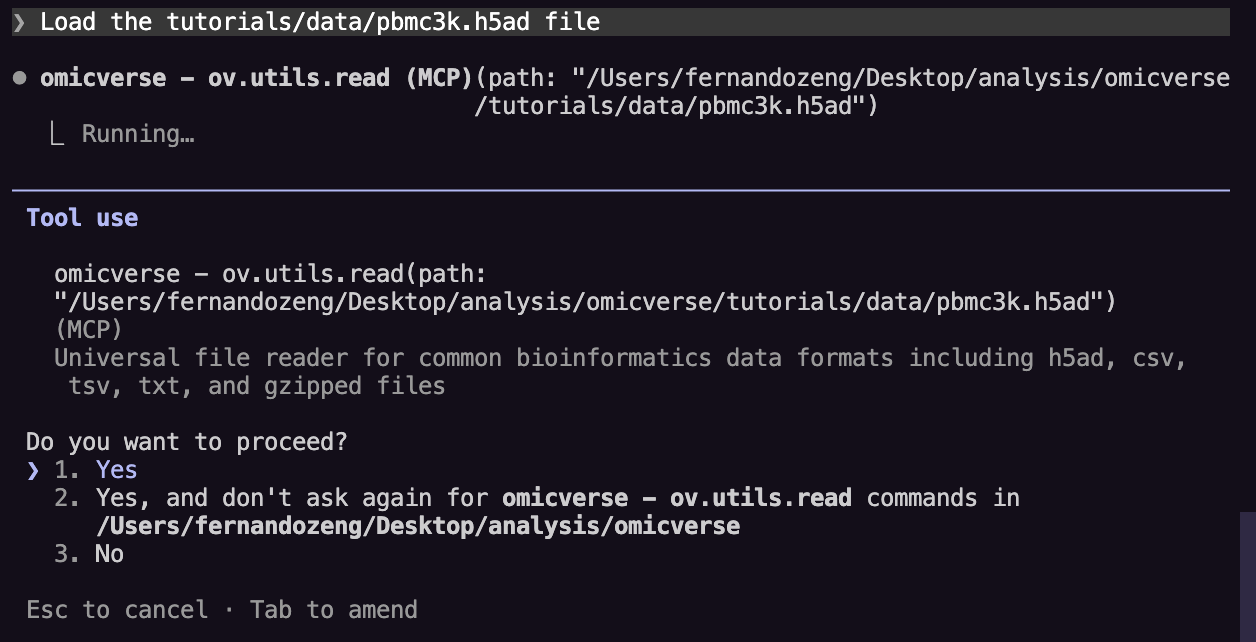
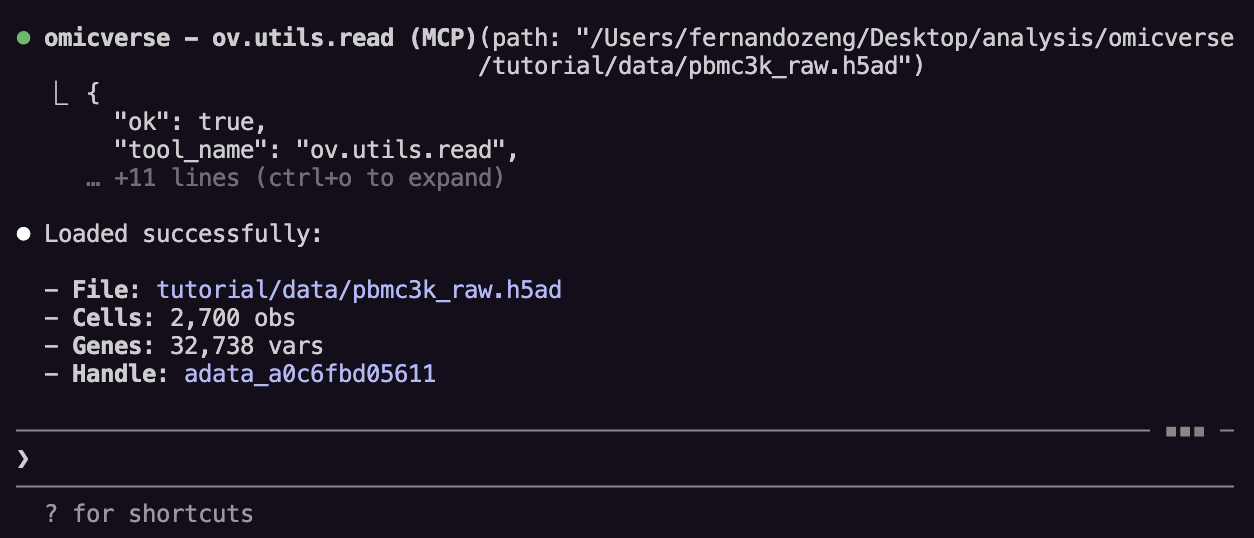
adata_id 是服务器端引用,Claude 会自动追踪它。
第 4 步:质量控制#
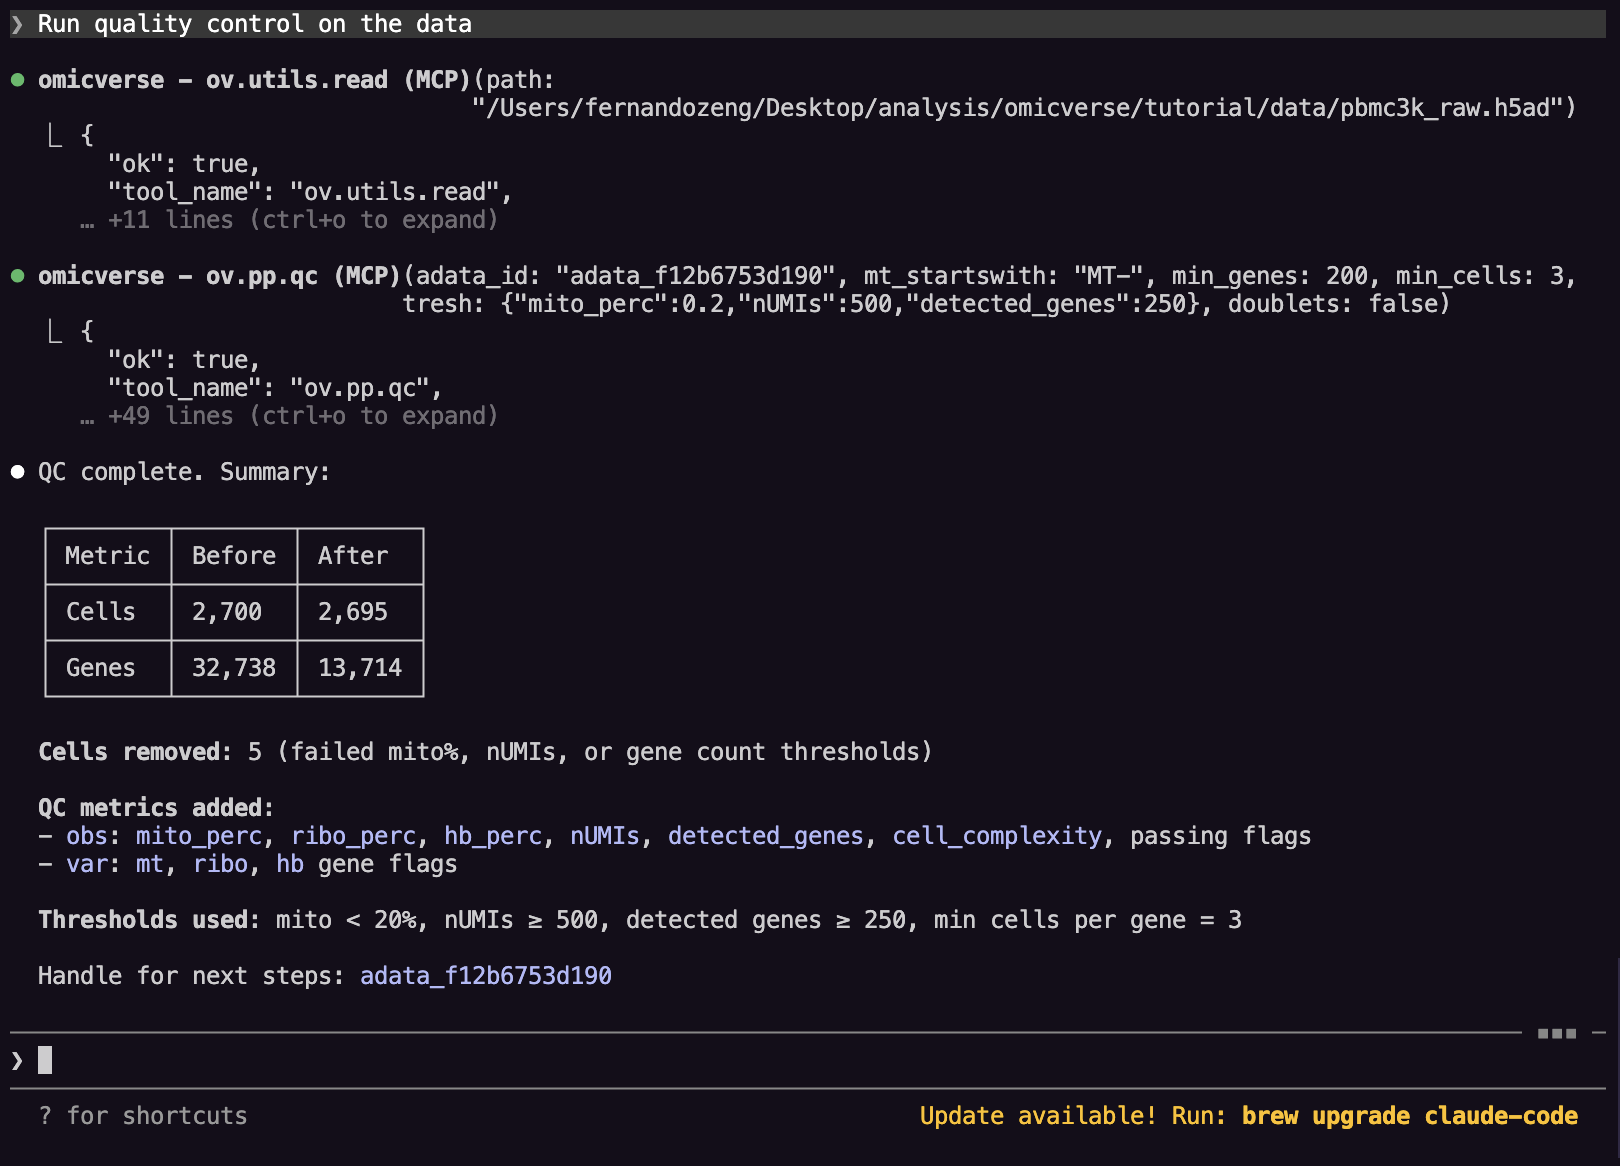
提问:
Run quality control on the data
Claude 调用 ov.pp.qc,计算每个细胞的指标,例如:
n_genesn_countspct_counts_mt
第 5 步:运行预处理#
提问:
Run the standard preprocessing: scale, PCA with 50 components, build neighbors, compute UMAP, and do Leiden clustering at resolution 1.0
Claude 依次运行以下工具:
ov.pp.scaleov.pp.pcaov.pp.neighborsov.pp.umapov.pp.leiden
自动前提条件检查#
MCP 服务器强制执行正确的步骤顺序。如果 Claude 跳过了某个步骤,服务器会返回如下错误:
{"ok": false, "error_code": "missing_data_requirements", "suggested_next_tools": ["ov.pp.scale"]}
Claude 可以利用 suggested_next_tools 进行自我纠正。
第 6 步:可视化#
提问:
Plot the UMAP colored by Leiden clusters
Show me a violin plot of n_genes grouped by leiden cluster
Create a dot plot for genes CD3D, CD79A, LYZ, NKG7 grouped by leiden
第 7 步:标记基因分析#
提问:
Find marker genes for each Leiden cluster and show me the top 5 per cluster
Plot a marker gene dotplot
Run COSG to rank marker genes
Perform pathway enrichment on the marker genes
Plot the pathway enrichment results
第 8 步:保存与恢复#
提问:
Save the current dataset to disk
之后恢复:
Restore the dataset from /path/to/file.h5ad
完整对话示例#
You: Load the file pbmc3k.h5ad

Claude: Loaded AnnData with 2700 cells x 32738 genes.

You: Run QC, preprocessing, and cluster the cells

Claude: I'll run the full pipeline step by step.
  [calls ov.pp.qc]
  [calls ov.pp.scale]
  [calls ov.pp.pca]
  [calls ov.pp.neighbors]
  [calls ov.pp.umap]
  [calls ov.pp.leiden]

You: Show me the UMAP

Claude: [calls ov.pl.embedding]

You: Find marker genes and show top 3 per cluster

Claude: [calls ov.single.find_markers]
  [calls ov.single.get_markers]

You: Save the results

Claude: [calls ov.persist_adata]
P2 工作流程#
如需高级的基于类的工具,请以如下配置启动 OmicVerse:
{
  "mcpServers": {
    "omicverse": {
      "command": "python",
      "args": ["-m", "omicverse.mcp", "--phase", "P0+P0.5+P2"]
    }
  }
}
这将启用以下工作流程:
ov.bulk.pydegov.single.pyscsaov.single.metacellov.single.dctov.utils.lda_topic
pyDEG#
典型生命周期:
ov.bulk.pydeg,操作createov.bulk.pydeg,操作runov.bulk.pydeg,操作resultsov.bulk.pydeg,操作destroy
pySCSA#
典型生命周期:
ov.single.pyscsa,操作createov.single.pyscsa,操作annotateov.single.pyscsa,操作destroy
MetaCell#
典型生命周期:
ov.single.metacell,操作createov.single.metacell,操作trainov.single.metacell,操作predictov.single.metacell,操作destroy
简短故障排查列表#
工具缺失:让 Claude 运行
ov.list_tools缺少依赖:让 Claude 运行
ov.describe_tool会话状态丢失:重新加载或使用
ov.restore_adata长时间运行的任务混乱:查阅运行时与故障排查